Difference between revisions of "Raw Video and Processed Image"
(typos) |
m (typos) |
||
| (2 intermediate revisions by 2 users not shown) | |||
| Line 1: | Line 1: | ||
== Intro == | == Intro == | ||
| − | This page is to help you | + | This page is to help you recognise different screen effects or glitches that help you understand what is needed to adjust the camera controls, TV, monitor, or projector. |
| − | When you open the lightgun software under the Configuration tab, you will see two videos, the left side of the video is Raw Camera and the right side is Processed Image. The goal is to get the Processed Image | + | When you open the lightgun software under the Configuration tab, you will see two videos, the left side of the video is Raw Camera, and the right side is Processed Image. The goal is to get the Processed Image showing a clear border and blue rectangle as stable as possible when the gun moves around against all odds. You are an eye doctor trying to fix the correct view for the lightgun to see the border. |
=== Software Video Feeds === | === Software Video Feeds === | ||
| Line 18: | Line 18: | ||
== Incorrect Processed Video == | == Incorrect Processed Video == | ||
| − | This Processed Image picture | + | This Processed Image picture shows incorrect vision when the lightgun can see poorly. |
[[File:Broken border by poor brightens.jpg|frameless|665x665px]] | [[File:Broken border by poor brightens.jpg|frameless|665x665px]] | ||
== Low Power USB Port == | == Low Power USB Port == | ||
| − | The Raw Video showed quick white flash or quick shift in the picture in the video. This is a glitch that causes low power in the camera. | + | The Raw Video showed a quick white flash or quick shift in the picture in the video. This is a glitch that causes low power in the camera. Possibly the USB you plug into is not getting enough power from that USB port. |
=== Examples === | === Examples === | ||
| Line 34: | Line 34: | ||
=== Troubleshooting Low Power === | === Troubleshooting Low Power === | ||
| − | * Try another USB port if you have USB 3.0 | + | * Try another USB port if you have USB 3.0. That will reduce troubleshooting to see if the lightgun camera is at fault or if the other USB port has insufficient power. |
| − | * Without USB 3.0 port, If you have two lightguns and the other works, try the working lightgun into that possibility of a low power USB port to see if the working lightgun has the same effect as the other lightgun. If it does have that same effect on the good working lightgun then probably the USB port is the issue of low power. The cause of low power of the USB port can have too many devices plugged into the USB port. That may cause the overloading of the maximum power that the USB port can't handle. | + | * Without a USB 3.0 port, If you have two lightguns and the other works, try the working lightgun into that possibility of a low-power USB port to see if the working lightgun has the same effect as the other lightgun. If it does have that same effect on the good working lightgun, then probably the USB port is the issue of low power. The cause of the low power of the USB port can have too many devices plugged into the USB port. That may cause the overloading of the maximum power that the USB port can't handle. |
| − | * | + | * Rebooting the computer can also fix that glitch. |
== External Lighting Effects == | == External Lighting Effects == | ||
The reason why the camera may show flashing lights is that Light Emitting Diode (LED), Fluorescent bulbs, and Compact Fluorescent Lamps (CFL) bulbs are turning on and off, the flickering on video becomes more pronounced and obvious because the camera's recording frames per second is unaligned with the frequency of electricity. This is called the strobe effect. | The reason why the camera may show flashing lights is that Light Emitting Diode (LED), Fluorescent bulbs, and Compact Fluorescent Lamps (CFL) bulbs are turning on and off, the flickering on video becomes more pronounced and obvious because the camera's recording frames per second is unaligned with the frequency of electricity. This is called the strobe effect. | ||
| − | Here an example of this strobe effect from the Compact Fluorescent Lamps in the background from the lightgun in the Raw video. | + | Here is an example of this strobe effect from the Compact Fluorescent Lamps in the background from the lightgun in the Raw video. |
[[File:Arrow is not jitter.gif|frameless|655x655px]] | [[File:Arrow is not jitter.gif|frameless|655x655px]] | ||
| Line 48: | Line 48: | ||
* CRT: Your camera’s frame rate doesn’t match up with the monitor’s refresh rate. | * CRT: Your camera’s frame rate doesn’t match up with the monitor’s refresh rate. | ||
| − | * LCD (including LED-backlit LCD monitors): You see a bit of flicker when an LCD monitor | + | * LCD (including LED-backlit LCD monitors): You see a bit of flicker when an LCD monitor displays a video camera. Much of this has to do with the pulse width modulation used to regulate the brightness of many LED-backlit displays. Pulse width modulation is essentially like flicking a power switch on and off at a very fast rate: It pulses the amount of power supplied to the backlight system based on the selected brightness level. All LED monitors are really LCD displays with LED backlights. |
=== Stobe Effect === | === Stobe Effect === | ||
| Line 65: | Line 65: | ||
=== Fixing Strobe Effect === | === Fixing Strobe Effect === | ||
| − | # Increasing brightness | + | # Increasing brightness and exposure from the Sinden Software camera controls. |
| − | # Change | + | # Change your TV, monitors, or projector settings to increase the brightness and contrast without washing out the colours. |
| − | # Try to get the brightness and | + | # Try to get the brightness and equal contrast levels of brightness because trying to reduce the blackness or darkness part of the display can create a stronger effect from your TV, monitors, or projector. |
| − | # Once you have nearly a stable blue rectangle as the Example 1 picture. You can adjust the | + | # Once you have nearly a stable blue rectangle, as in the Example 1 picture. You can adjust the Border Colour Match Radius setting in the Configuration tab. |
| − | You won't be able to | + | You won't be able to eliminate the strobe effect completely but reduce it so the Processed Image shows the correct vision. |
| + | <br> | ||
| + | <br> | ||
| + | [[Category:Troubleshooting]] | ||
Latest revision as of 15:10, 29 December 2022
Intro
This page is to help you recognise different screen effects or glitches that help you understand what is needed to adjust the camera controls, TV, monitor, or projector.
When you open the lightgun software under the Configuration tab, you will see two videos, the left side of the video is Raw Camera, and the right side is Processed Image. The goal is to get the Processed Image showing a clear border and blue rectangle as stable as possible when the gun moves around against all odds. You are an eye doctor trying to fix the correct view for the lightgun to see the border.
Software Video Feeds
These two video feeds are tools to correct the problem of lightgun vision.
- Raw Camera is what the camera sees that your eyes can't see.
- The Processed Image is what the lightgun sees.
Correct Processed Video
This Processed Image picture is the correct vision when the lightgun can see clearly.
Incorrect Processed Video
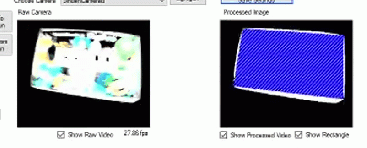
This Processed Image picture shows incorrect vision when the lightgun can see poorly.
Low Power USB Port
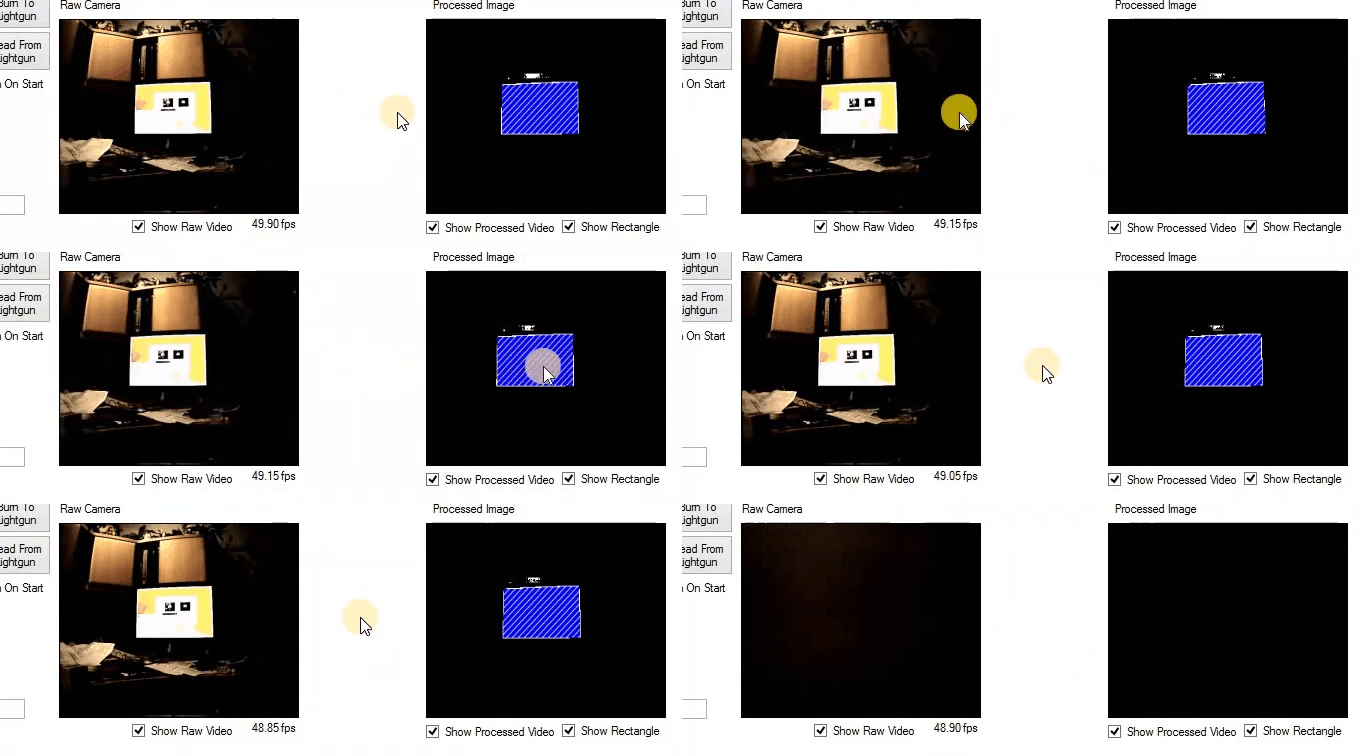
The Raw Video showed a quick white flash or quick shift in the picture in the video. This is a glitch that causes low power in the camera. Possibly the USB you plug into is not getting enough power from that USB port.
Examples
Example Results of Low USB Power:
Troubleshooting Low Power
- Try another USB port if you have USB 3.0. That will reduce troubleshooting to see if the lightgun camera is at fault or if the other USB port has insufficient power.
- Without a USB 3.0 port, If you have two lightguns and the other works, try the working lightgun into that possibility of a low-power USB port to see if the working lightgun has the same effect as the other lightgun. If it does have that same effect on the good working lightgun, then probably the USB port is the issue of low power. The cause of the low power of the USB port can have too many devices plugged into the USB port. That may cause the overloading of the maximum power that the USB port can't handle.
- Rebooting the computer can also fix that glitch.
External Lighting Effects
The reason why the camera may show flashing lights is that Light Emitting Diode (LED), Fluorescent bulbs, and Compact Fluorescent Lamps (CFL) bulbs are turning on and off, the flickering on video becomes more pronounced and obvious because the camera's recording frames per second is unaligned with the frequency of electricity. This is called the strobe effect. Here is an example of this strobe effect from the Compact Fluorescent Lamps in the background from the lightgun in the Raw video.
Monitor Differences
What does this have to do with my TV, monitors, or projector? Although the technologies inside CRT and LCD monitors are quite different, what’s happening in each scenario has a similar underlying cause:
- CRT: Your camera’s frame rate doesn’t match up with the monitor’s refresh rate.
- LCD (including LED-backlit LCD monitors): You see a bit of flicker when an LCD monitor displays a video camera. Much of this has to do with the pulse width modulation used to regulate the brightness of many LED-backlit displays. Pulse width modulation is essentially like flicking a power switch on and off at a very fast rate: It pulses the amount of power supplied to the backlight system based on the selected brightness level. All LED monitors are really LCD displays with LED backlights.
Stobe Effect
Example 1 - Good
Example 2 - Bad
Example 3 - Very Bad
Fixing Strobe Effect
- Increasing brightness and exposure from the Sinden Software camera controls.
- Change your TV, monitors, or projector settings to increase the brightness and contrast without washing out the colours.
- Try to get the brightness and equal contrast levels of brightness because trying to reduce the blackness or darkness part of the display can create a stronger effect from your TV, monitors, or projector.
- Once you have nearly a stable blue rectangle, as in the Example 1 picture. You can adjust the Border Colour Match Radius setting in the Configuration tab.
You won't be able to eliminate the strobe effect completely but reduce it so the Processed Image shows the correct vision.


